Idea to creation of my projects
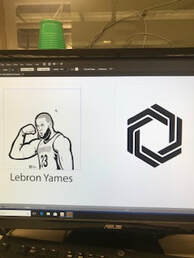
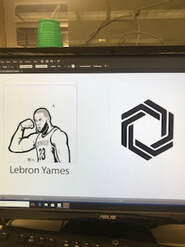
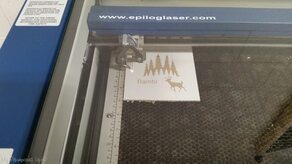
For my first laser project I almost instantly found what I wanted. For the first project you needed a two pictures with one of them having a text box beneath. I found a picture of Lebron James and a cool logo and was on my way. I did all the editing I needed and just needed to have it laser printed. I did this before we went into all of the rotations and when it was time to do the laser rotation I found that my project was missing. I could not find it so I ended up doing it all over. I was able to get it done and printed off and it turned out really nice. Now for my next laser project I had to laser engrave a water bottle. For this project I picked the cubs logo. I copied onto adobe illustrator and did the editing I needed. I then transferred it to the computer by the laser engraver. Here I put my water bottle in and started printing it off. After about 10 minutes it was complete and it turned out really nice. Now for the final project we had to laser print something out of cardboard. I found what I wanted to make on thingiverse and downloaded the data onto my own adobe illustrator page. I did the editing I needed to do and I was ready to print. I printed each piece out in one go and assembled the pieces together. Now I had completed all three projects and they came out pretty good.
My "Recipe"
|
Project #1
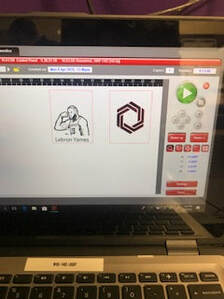
For the first project we needed to select two pictures and have text beneath one of them. I picked lebron James and cool logo and I was on my way. I put them into boxes in adobe illustrator and did the editing I needed to do in order for them to be cut out properly |
|
|
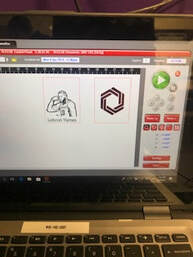
Next, I transferred my data onto my hard drive and put it in the computer connected to the laser cutter. Then I selected the material that I wanted to use and put it inside the laser cutter. After measuring the width of my material I put it in the top right corner and logged it into the computer. I set up my design so that it would cut out properly and I started the cut.
|
|
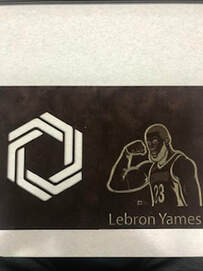
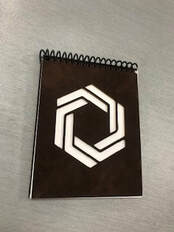
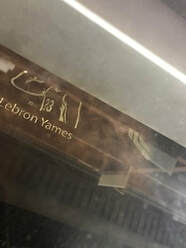
After about 5 to 10 minutes my project was complete and it had come out very nice. I took the matt paper out of the laser engraver and separated the two designs that I had made. It had come out exactly how I had wanted and it.
|
|
|
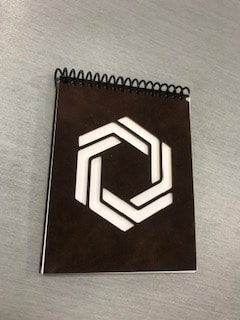
After that I put holes into the top of both pieces. I also cut 5 sheets of paper into 20 small squares. After that I put the same holes into the paper. I put them all together and put the curling plastic wire through and my project was complete. I had finished it and It came out very nice.
|
|
Project #2
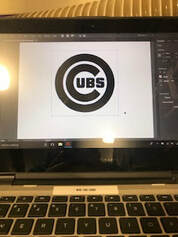
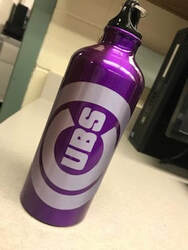
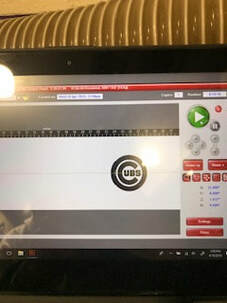
For my next project I needed to put a design on a water bottle. I instantly knew what I wanted to put on it. I found a cubs logo that I like and transferred it to adobe illustrator. I edited the photo so that it could properly be engraved on the water bottle then transferred the info to the computer connected to the laser engraver. |
|
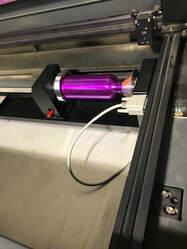
Now I had to set up the water bottle properly so the design would be properly engraved. I fit it between the two pieces and made sure it was aligned. Now I could begin editing my image to make sure it prints off on the water bottle correctly.
|
|
|
Now that my water bottle was set up I had to set my logo on the correct spot. I constantly moved my logo to make sure that it would print of in the middle and not be cut off. Once I did this my logo was in the correct position and the laser engraving began
|
|
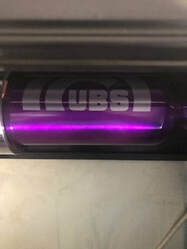
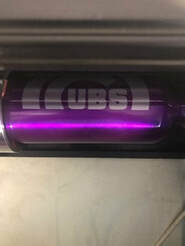
After about 10 to 15 minutes the laser was done. I pulled my water bottle out and the logo had been engraved perfectly. I put the cap back on the water bottle and it turns out that the water bottle is exactly how I had wanted it.
|
|

|
Project #3/Final project
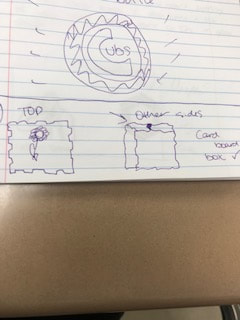
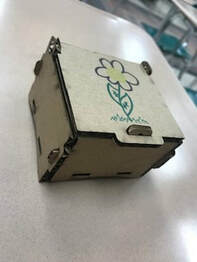
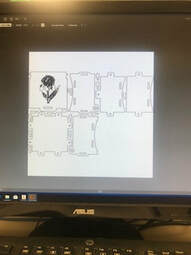
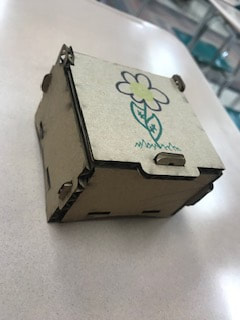
Now for my last project I had to find what I wanted to make on thingiverse. Here you have to find what you want and transfer all the data to your adobe illustrator cite. I found what I wanted and did exactly that. I did the editing I needed to do and transferred that data to the computer linked to the laser engraver. |
|
After I set up everything I needed on the computer, I put my cardboard in the laser engraver. I had already made sure my piece of cardboard was big enough for what I was doing. I made sure the cardboard was in the right spot and let the laser engraver go to work.
|

|
|
after about 2 to 3 minutes the laser engraver was done and it had come out pretty good. There was one bottom piece missing but I was able to make adjustments. I took it out and put all of the pieces together. I had finally finished my thingiverse project and it came out really nice.
|
My digital documents
|
Project #1
|
Project #2

|
Project #3
|
My setup on UCP/Illustrator
|
|

|
Using the Laser
|
|
|
My final projects
|
Project #1
|
Project #2

|
Project #3
|
Summary of what I learned
I learned a lot after the end of this rotation. After doing three different projects in the second go around, I gained a lot of knowledge about how to use laser engravers. I used matt paper, a water bottle, and cardboard in the machine. I know how to engrave and cut out anything I want. Using adobe illustrator I was able to edit any photo I chose and make it do whatever I want when it was put through the laser engraver. With the matt paper I cut out a logo and laser engraved Lebron James. I had both of the pictures cut out and put into a little spiral notebook. For my next project I took a cubs logo and edited it so that it could be engraved onto a purple water bottle. I did so and it came out very nice. For the last project I had to make something out of cardboard. You had to get something off of thingiverse and have it put through the laser engraver. Once it was cut out you had to put it together. I did just that and my project came out really nice. I chose to make a cardboard box with a flower on top. After completing all of these project I was now advanced at using these machines. I made all of these projects and they came our really nice.
